Pumpkin Carving with kids 5 years & up ..the easy way!
PEST
Let's face it that's why we are here, ..all those years ago when you were allowed to go "stab happy" with an oversize bread-knife, we don't wan't to go through that again do we!?
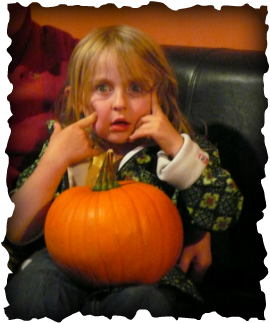
I dreaded carving with my daughter... then having completed one with her, it has made such a bond between father & daughter, I am as proud as she is, we have a better understanding of each other, it has meant she listens more & there is increased trust between us! ..wonderful not to mention a new family tradition has been born!
I pre-prepped in order to make it as infallible as possible, however as I only have one child to concentrate on, I would seriously recommend one parent per child, lock the doors & do it individually as a project, if a child feels they have your total attention on this project the results are going to be better, not to mention we are using sharp blades & saws here so need "quiet & control" ..it' will be the others turn soon enough.
It turned out to be an absolute pleasure, the result of which may be seen on the homepage...
Whilst I will leave regular carving technique to Stoneykins & Zombie pumpkins they have excellent guides, I feel that carving with a small child of say 5 years is a different ball game...
So pop on over look at all these recommended guides, ..come back & read on.
http://www.stoneykins.com/Carvingreal.html
http://www.stoneykins.com/Cut_Out-Easy_2.html
http://www.zombiepumpkins.com/tips-tools.php
I popped 3 up because amongst the 3 they detail everty aspect so well, some are more visual than others, ..hopefully you'll get the gist just browsing over the 3 links & it will be burnt into your brain, making for a simple less fraught, downright enjoyable experience.
So let's prepare!
Start by treating yourself to Zombie Pumpkins formidable pro carving set.
get hold of a small head torch & batteries (if available)
Possibly use latex gloves (some folk react to pumpkin acidity a bit)
1 x pan for pumpkin guts.
1 x pan for pumpkin seeds.
Possibly some talcum powder
Saral paper (optional but sensible)
Kitchen paper towel, mopping wiping, dabbing etc..
First aid ..Just in case!
clothing: it might get a bit messy, so no whites / light clothes, more mess around clothes wherever possible.
If you have no intention of eating the scraped flesh, dogs love pumpkin! ..heated & popped in with their biscuit, not too much at a time as too much may give them the squits! , we bag & freeze it for use later.
If you've never carved a pumpkin before now is the time to get to grips with one for yourself, your ability to assist a child carving a kin will be far more successful if you are able to impart / describe to them what they are aiming to achieve based on your own familiarity with both pumpkin & tools.
Where you choose to cut is up to you, & dependent upon your childs height, however I recommend your child stands, feet firmly on the floor with the pumpkin on the edge of a kitchen counter / worktop in order that we can move around it without fear of falling off a stool, & the adult can tilt the pumpkin as & when required.
Also remember your child needs to see the gradual process evolve if we are to hold their attention, so be prepared to have a 5 minute break or 3 whilst popping / hooking out cut pieces in order that we can see the lit masterpiece as it gets better & better, expect a few lights on & off for the duration, however if you've placed a light in already your design should be glowing nicely from the beginning as you cut in, it is all part of the game so go for it, ..enjoy & learn with your child.
Do not think this is too hard for your 5yr old, if you follow this guide feel along the cutting process (the saw teeth "chewing" vibration will pass through your childs hand into your own) offer constant reassurance & guidance, don't grip hard, crushing your child's hand, ..stay loose.
Parents should insert the blade under guidance, as they should removal, ..you are guiding a child & both of you will learn what level of pressure is required in each instance.
By pre-scoring the pumpkin pattern we have cut through the tougher flesh so minimal resistance should be felt.
By popping a light into the pre-scored pumpkin we have already made it fairly obvious to the child as to the pattern & cut lines, & ultimately what we are aiming to display, they are still doing ALL the sawing,
YOU may be doing the fine touch up, & especially the hooking out / pushing in of completely cut through parts.
At this stage please bear in mind that at some point of carving you may wish to place your spare hand inside to support parts of the pumpkin, so it's vital your child is aware of listening to instructions, spread fingers beyond the area your child is cutting to get a feel of the saws movement.
Choose your design from the recommended sites, preferably a cut through without too many "tight cuts"
Print out 2 copies per pattern ..one to follow as a reference guide, one to be placed on the pumpkin itself.
Now follow the initial steps as per stoneykins website / zombie pumpkins, gut it without your child preferably, ..as their attention may wane prior to actually popping a cut out!
Taking your serrated blade check the walls are thin enough to glide through with minimal pressure (1/2- 1 1/2 inch wall thickness) if also using a scalpel (you not your child) also gauge thickness in this manner also, you'll be tidying up.
Now mum or dad will have to have stencilled on the pattern, OR have traced it with light cuts with the scalpel.
it is essential you talk to your child throughout carving, it's a new skill for them after all, & literal guidance by the adult, thus a quiet calm area with just one child at a time.
The advantage of this is that whilst standing over your child, a steady battery light source already in the pumpkin you should be able to see lightly illuminated lines that you have pre-scored with a small blade such as a scalpel (NOT DOTTED).
By having this glowing visual in front of you, & a reference sheet of the pattern to the side, you can now help your child with the 1st central saw cuts
Start cutting / sawing from the middle of a design & work outwards as it helps support the design, maintaining rigidtity & overall strength.
Hold your childs hand AT ALL TIMES, (you are essentially covering & guiding their carving hand on top of the handle in order that you can feel exactly what they feel & make critical decisions as to turning, halting, removal & placement of the blade) as they "SLOWLY" press the saw into the cut, check with them all the time that they can fel the individual teeth hitting & cutting individually, yes we will be going that slowly!
Continue to reinforce this as correct speed.
Help your child turn the saw blade from the wrist
Make them concentrate, via your CONSTANT verbal guidance (up, down, left, right, deeper, lightly etc) follow the lit cut line at all times, making sure they know exactly how far to go at all times.
STOP regularly to reduce any possible cramping & sore backs, (we adults can grip their little hands too hard more often than not).
Resist the urge to poke too much excess flesh out, it forms support & reduces pattern flex & weakness, try & wait for a "partial" grand unveiling.
Make sure your hand is not obscuring your child's view.
If your cut lines are not overly visible, try enhancing by means of a light smearing of talcum powder to raise the lines worked into the cuts, handy to highlight where you and your child have cut with the saw.
When poking larger pieces out after completely sawing round, don't expect them to fall away instantly,
..they often need extra teasing or additional cuts to poke them into the pumpkin (never pull outward) ..choose which less structural pieces your child will be allowed to poke through after cutting, if there is any doubt as to strength of the pattern holding find another piece, after all you repair is harder than actual cutting correctly in the first instance!
For repairing slipped cuts try cocktail sticks to hold & insert fallen pieces, some folk recommend super-glue, personally I have never needed either as due care & diligence is observed at at all times.
Lastly don't be afraid to do any fine cuts / tight cuts (such as eyes) by yourself, just get your child back in the project as soon as in order that it remains THEIR pumpkin, ..you can carve your own!
Always allow children to fully participate in scooping out the excess flesh that an adult has loosened, gooey cool walls are fun, & any stringy bits left on clothes will come out in the wash.
RECOMMENDED 1ST TIMER STENCILS.. (all at zombiepumpkins.com)
For a traditional Halloween theme try zombie pumpkins "oogie boogie 2" starting with the eyes & mouth, then working outwards..
"HORTON" (PUMPKIN FACE)
"SAM'S JACK-O-LANTERN"
I heartily recommend Oogie Boogie 2 it's quick & simple lines really stand out upon lighting, you'd never guess your amateur status, it's quite forgiving in terms of it's overall design, i've supervised a first time carving few 7-8 year olds, they pretty much cut it all by themselves.
Resist the urge to let your child do a favourite character e.g. toy story, as the stress to complete will be all on your shoulders, perhaps consider surprising your child with one before you do a pumpkin with them as part of the project introduction, ..also adding to your own experience & comfort when cutting!
Sorry for the absence of photo's (which will follow), I wrote this as an afterthought to my own experience carving with my daughter, i'll photograph the process for the run up to Oct 2012.
Oogie Boogie 2 cutting process
- Eye slits.
- top line of mouth.
- bottom line of mouth (join up & tease it into the pumpkin, ..for a larger cut out such as the mouth you may want to cut a few portions for your child to push through , safer & less chance of disaster, I rarely try to push through a cut piece in one large segment)
- Cheeks & forehead.
- Shoulders.
- pointed area (the tight cut)
- top of head pointy side through to narrowing tip.
- top of head (outer edge) back down to shoulder
- top of head (outer edge) down to shoulder ..other side.
- ..you're done! ..bathe in the glory of a pumpkin well carved, ..light up & admire!
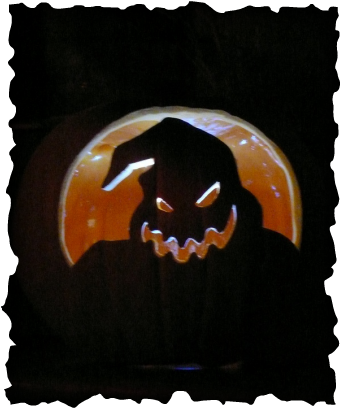
OOGIE BOOGIE 2.