Tool time! ...with a nod to Zombie pumpkins shop! ..OR .."In Ryan I trust"
Just like your old woodwork / metalwork / playdough teacher at school, ..we try to keep sharp tools away from your grubby mitts until we've gone through a few basics...
Ryan at ZP has proven time & again to despatch internationally "lickety split", his un-erring speed at getting it in the post from his base in America (pay via paypal) has often made me wonder if he's sleeping with the female staff & gets his orders processed out of hours & popped on visiting rock stars tour planes as they cross the atlantic! ....or maybe my postman just looks alot like Bono !?
Maybe i'm lucky, however i've had orders received by myself within 3 days ...fast, very fast! ..the key as ever is order with due haste, preferably by the start of October as in season items runs out the doors & stock "post haste"
He's a decent guy, & doesn't rip you off for postage, all the main tools I recommend have come from his sites store, the one stop "shocking shop", the items are tried & tested, the best on the market for getting all the boxes ticked from carving to lighting the gurney-grin of your pumpkin!
Actually the point in all this boils down to ONE thing "pro-tools" make for professional results.
On the other hand most cheap carving & stencil sets from a supermarket may suffice, but just as likely bend or snap whilst on your first pumpkin! ..if so what are you going to do? , those kits are often awkward & uncomfortable to hold for any given period & have all the cutting & slicing ability of a slice of thin white frozen bread.
So Pay Ryan at Zombiepumpkins.com a visit an easy job well done, ..in one simple hit!
For tools (bearing in mind the amount of real pumpkins we (I) do, I cannot sing praises high enough to..
"The pumpkin Gutter"
This little scamp fits nicely on a power drill (recommend a mains power with additional grip over a battery type drill) & positively powers through pulp!
Best if there are 2 of you one to hold the drill & gutter, the other to slowly rotate the pumpkin, keep hair tied back obviously, & think about safety glasses for the person holding the pumpkin because pumpkin guts are rather acidic!
..Oh and another thing, until you've got to grips with this tool ..do it outside unless you want the occasional spray of guts plastered around the kitchen!
Great you tube demonstration video for it (below) ..you'll see why it makes sense, get one, get your street or friends together & get cracking, makes for a fast & easy way to get onto the actual carving!
For example a basic Gut & thin of a 18-20lb pumpkin (large for the uk) takes around 3 minutes in a leisurely manner, including thinning the walls to assist in carving & overall glow.
A pumpkin Gutter is a nice extra to have in your kit, & is a great item to have if you are involved in a community event trying to raise money for a cause or just as a large carving get together.
A composting bin, & a smaller wide mouth container to empty guts into perhaps a money making service in itself for a school PTA or society to offer in return for donations (whether or not they are actually celebrating or promoting Halloween as an event), at which point you could also offer a selection of pre-printed stencils.
A good way to publicize this sort of event is to print out an assortment of stencils on A4 copier paper to go out with a newsletter, that way they're aware of your idea & at the very least the children & parents have another opportunity to use a stencil or check out a site to find something more within they're range of interest & ability.
Do remember the seeds are delicious roasted off in the oven with a salty seasoning! ..very satisfying!
Choose your weapons..
There are 4 essential tools in my book,
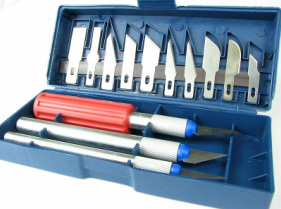
one costs around a £1 in the likes of B&Q pound bins this multi blade scalpel set, you may be shang-hai'ed pricewise elsewhere though.
Typically sold in a blue box with around 12+ assorted blades, ..keep this away from children though & be aware scalpels have a tendency to roll, wrap an elastic band or similar round the body to help keep it stable & on the table.
Tape for your stencil (no we're not going to free-hand), you do want to finish tonight don't you?
For a genuine fleshy pumpkin I actually pull out my 3m tape from my first aid kit, it' also serves as a reminder to get this out in case of any slippages & subsequent need for treatment.
As the 3m tape is low tack, designed for adhering nicely but gently to dry flesh, it also works well adhering to dry pumpkin skin & paper.
After several years of messing around I have to thank my wife for suggesting this!
I also curse her for not suggesting it sooner!
The Pro-Pumpkin-Carving Tool
Not just good on pumpkins, durable & capable even in little hands with parental guidance, ..but more about carving with kids later..
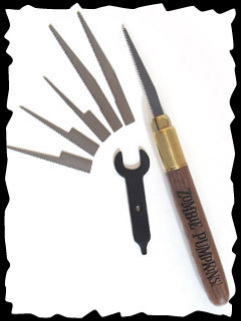
The "Pro Pumpkin Carving Tool" features a walnut handle (laser engraved with Zombie Pumpkins logo ). A brass chuck allows for swapping of blades with supplied wrench.
This originates from the firm "warren pro cutlery" (in case you are wondering) which is available in the uk, however when i've found it it was considerably more costly than direct from Zombie Pumpkins..
Z.P. edition carving tool image reproduced courtesy of Zombiepumpkins.com
Kit includes 6 saw-tooth blades (3 heavy duty, 3 fine tooth) made of strong high carbon steel ..trust me these last, I have 2 sets (basically to avoid blade changes) to share with another person without dropping your rythm & concentration.Out of Halloween season it's a great tool for cutting insulation boards, plasterboards, general diy, & i'm still on my original set of blades.The trick is not to wade straight in & slice, but to feel the serrated blades bite the flesh, this gives you assurity of constant, precise cutting & should be learnt as a child to successfully guide your tool into tight confinement without trauma!
Saral paper ..the optional "other" holy grail!
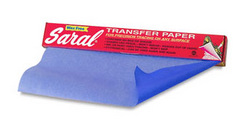
OK, so this marks you out from the crowd as "special" where pumpkins are concerned, whilst you can simply print out direct to a page of A4 your chosen design this blue sucker is the "crack" rock of pumpkin carvers, & quilters ..who'd have guessed!?
You'll still need your A4 photocopy taped over this see through paper however it reacts to light pressure when you go over the stencil outline with a blue / red pen (to show where you've been) this means we can pre stencil our pumpkins way ahead of the crowd & choose the moment we cut into a kin thus ensuring it's eventual demise, ..pro's & busy people prep ahead..
If you're used to poking little holes to transfer your patterns, update your modus operandi, save time and hand strain with wax free Saral transfer paper. Makes for clean, crisp tracings that won't smudge while you carve, but can be easily removed with a damp paper towel wipe over.
High contrast blue transfer paper comes on rolls 12 inches wide, 12 feet long. Enough to transfer about 20 patterns.
ALSO AVAILABLE IN THE UK VIA QUILTERS CRAFTING SUPPLIES AROUND £10 INC P+P
..i'll pop a link up asap!
Lights, lights & err,...MORE Lights!
It's got to be L.E.D.'s y'hear me?
Not only because I'm a bit of an eco hippy but because a lower power draw means strong light lasts longer, this is especially useful in a very chilly environment where batteries struggle at the best of times.
No filament = safer in storage, in situ, in kids & butterfingers hands!
I recommend you invest in a decent battery charger & pop over to 7dayshop.com in order to avail yourself of their own brand "1000" power AAA's
3 per howler light if you follow my lead.
Also worth noting I use a morphing colour howler light for my daughter as a night light when we travel, ..works very well!
Some of my Howler lights are 5 years old I'd guess & bearing in mind we could light up as early as October 1st, that racks up a significant amount of hours.
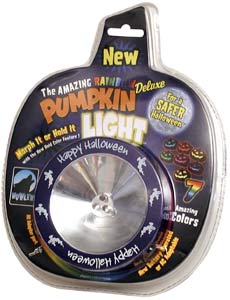
More specifically I really do recommend "Howler Brand"
There are 3 serious Pumpkin lights to choose from, some of which have undergone some miniaturisation but still remain true to form, & brightness!
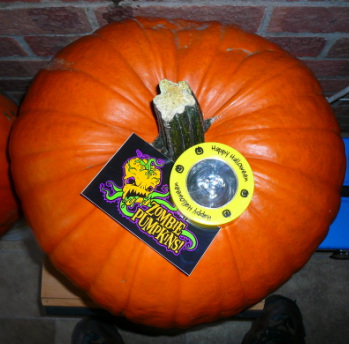
The first (as pictured above) is the eponymous Howler "Rainbow Deluxe" 7 colour 2 speed light, worth noting you can also make it stick on whichever colour you choose merely by cycling through, theres only one button to contend with so no explanations necessary. ..I have around 60 of this variety at a guess.
Not only because I'm a bit of an eco hippy but because a lower power draw means strong light lasts longer, this is especially useful in a very chilly environment where batteries struggle at the best of times.
No filament = safer in storage, in situ, in kids & butterfingers hands!
I recommend you invest in a decent battery charger & pop over to 7dayshop.com in order to avail yourself of their own brand "1000" power AAA's
3 per howler light if you follow my lead.
Also worth noting I use a morphing colour howler light for my daughter as a night light when we travel, ..works very well!
Some of my Howler lights are 5 years old I'd guess & bearing in mind we could light up as early as October 1st, that racks up a significant amount of hours.
More specifically I really do recommend "Howler Brand"
There are 3 serious Pumpkin lights to choose from, some of which have undergone some miniaturisation but still remain true to form, & brightness!
The first (as pictured above) is the eponymous Howler "Rainbow Deluxe" 7 colour 2 speed light, worth noting you can also make it stick on whichever colour you choose merely by cycling through, theres only one button to contend with so no explanations necessary. ..I have around 60 of this variety at a guess.
Flickering Candle flame effect Howler light.
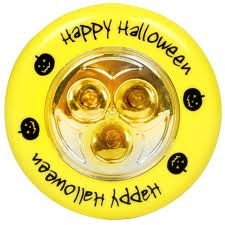
Re-modelled with a smaller footprint than previous years I was expecting this to have a limited overall effect! ..how wrong could I have been?
With a steady almost random flicker speed this is set up to be a real "guttering" flame effect, sending a fabulous eye catching glow that draws crowds in & shows your carving to great effect.
Don't allow it to get wet though, either raise it or seal it as there can be some water ingression, however in my experience it still worked flawlessly even when half submerged during a storm, I feared the worst, removed the batteries & allowed it to dry well, worked fine, has done since! (though i'd recommend if water ingress occurs dismantle, dry, wd40 the contacts, dry again, polish & re-seal, just to be on the safe side & protect against terminals rusting). Highly recommended for the flame purists.
FAST Strobe effect Howler light

Best described visually, ..so see the you tube segment below.
Same chassis moulding as the flicker effect but in green ..lots of impact!
I have a few other brand of lights purchased out of curiosity, none of them ever come close to the Howlers, ..I'm a very happy consumer !
Image & video courtesy of Zombiepumpkins.com
Same chassis moulding as the flicker effect but in green ..lots of impact!
I have a few other brand of lights purchased out of curiosity, none of them ever come close to the Howlers, ..I'm a very happy consumer !
Image & video courtesy of Zombiepumpkins.com
Whilst this page covers your basic tool collection no carver should be without ..we will expand on tool ranges for shading pumpkins courtesy of "stoneykins"